Upload File
You can use this field when you want to upload files through web forms. It works with various form platforms including Google Forms, Microsoft Forms, and other web-based file upload interfaces.
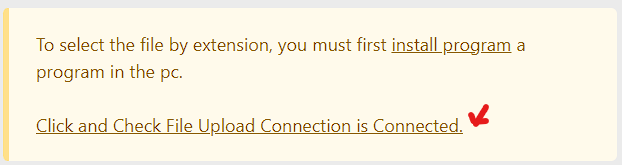
🔧 Install Helper Program
The Helper Program is required to automatically select and upload files from your computer. Download and install the appropriate version for your operating system:
Important
The Helper Program must be installed and running for file upload functionality to work properly.
How to check Helper Program status?
⚙️ Field Options
The Upload File field provides comprehensive options for handling file uploads with various configurations:
| Option | Description | Required |
|---|---|---|
| Set File/Folder Base Path | Enable to specify a base directory for file uploads | No |
| Base Path | Enter the folder path where your files are located (e.g., D:\folder\) | When enabled |
| Multiple File Upload | Enable to upload multiple files at once | No |
| Separator for Multiple File Upload | Specify separator for multiple file names (e.g., \r\n, ,, ;) | When multiple files enabled |
| Upload all files in a folder | Enable to upload all files from the specified folder | No |
| First check that the file exists in the PC, then select the file | Verify file existence before attempting upload | No |
| Set the uploading browser window title name | Customize the browser window title during upload | No |
| Browser Window Title | Enter custom title for the upload window (e.g., "Open") | When enabled |
| File Name/Path | Enter the file name/path in the field value or default value | Yes |
📋 Configuration Details
📌 File Name/Path
- Purpose: Enter the file name/path in the
field valueordefault value - Format: Use full path with backslashes (Windows) or forward slashes (Unix/Linux)
- Example:
Note
You can use the {$predefine_variable$} variable in the File Name/Path option.
If using file name :
You must set the file root path in the Set File/Folder Base Path option and set the file name in the File Name/Path option.
for example:
File Path (Set in Base Path option) : D:\Documents\Uploads\
File Name (Set in File Name/Path option) : file.txt
If using file path :
If you are using file path then you must set the file path in the File Name/Path option. Don't set the file root path in the Set File/Folder Base Path option.
for example:
File Path (Set in File Name/Path option) : D:\Documents\Uploads\file.txt📂 Set File/Folder Base Path
- Purpose: Defines the default directory where files are located
- Format: Use full path with backslashes (Windows) or forward slashes (Unix/Linux)
- Example:
D:\Documents\Uploads\or/home/user/uploads/
📎 Multiple File Upload
Purpose: Allows uploading multiple files in a single operation
Separator Options:
\r\n- Line break (newline),- Comma separated;- Semicolon separated- Custom separator as needed
Note
Extension allow you to use file path with starts and ends with quotes, for example
Single File Path
"C:\Users\cth\OneDrive\Pictures\demo\Screenshot 2025-06-03 172854.png"Multiple Files Path
"C:\Users\cth\OneDrive\Pictures\demo\Screenshot 2025-06-03 172854.png"
"C:\Users\cth\OneDrive\Pictures\demo\Screenshot 2025-05-30 163020.png"
"C:\Users\cth\OneDrive\Pictures\demo\Screenshot 2025-06-03 122313.png"
✅ File Existence Check
- Purpose: Validates that files exist on the local system before attempting upload
- Benefit: Prevents upload failures due to missing files
- Recommended: Keep enabled for reliable uploads
🏷️ Browser Window Title Customization
- Purpose: Sets a custom title for the file selection dialog
- Use Case: Helps identify the correct upload window in multi-window scenarios
- Default: "Open" (standard file dialog title)
📢 Handling Empty Excel Field Values
When working with Excel data, you may encounter situations where the file path field is empty for certain rows. By default, the extension will attempt to process the upload action even when the Excel field value is empty, which can cause errors or unwanted behavior.
⚙️ Skip Action for Empty Values
To skip the upload file action when the Excel field value is empty, use the "Skip field action if given field value matches" field option:
- Enable the Option: Check the "Skip field action if given field value matches" checkbox in the field options
- Set Empty Value Pattern: Enter
''(two single quotes) in the value field - How It Works: When the Excel field value is empty, the extension will skip the entire upload action for that row
Best Practice
This is especially useful when:
- You're using the "Set File/Folder Base Path" option
- Some rows in your Excel sheet have files to upload while others don't
- You want to avoid errors from attempting to upload non-existent files
📝 Configuration Example
Field Options Setup:
✅ Set File/Folder Base Path
   Base Path: D:\Documents\Uploads\

✅ Skip field action if given field value matches
   Value: ''
Excel Data:
| Row | File Name | Result |
|---|---|---|
| 1 | document.pdf | ✅ Uploads D:\Documents\Uploads\document.pdf |
| 2 | (empty) | ⏭️ Skips upload action |
| 3 | image.jpg | ✅ Uploads D:\Documents\Uploads\image.jpg |
| 4 | (empty) | ⏭️ Skips upload action |
Note
- The value
''represents an empty string - This works with both file name and file path configurations
- You can combine this with other field options for more complex scenarios
💡 Usage Examples
📄 Single File Upload
- Enable "Set File/Folder Base Path"
- Enter your file directory path
- Enable "First check that the file exists in the PC"
- Set your desired browser window title
📎 Multiple File Upload
- Enable "Multiple File Upload"
- Set appropriate separator (e.g.,
,for comma-separated) - Configure base path if needed
- Enable file existence check
📁 Upload All Files in Folder
- Enable "Upload all files in a folder"
- Set the target folder path
- Configure other options as needed
🔧 Troubleshooting
⚠️ Common Issues and Solutions
🔧 Helper Program Not Working
Problem: File upload fails or helper program not detected Solutions:
- Ensure the Helper Program is installed and running
- Check if the program is blocked by antivirus software
- Restart the browser and extension
- Reinstall the Helper Program if necessary
📂 Files Not Found
Problem: "File not found" errors during upload Solutions:
- Verify the base path is correct and accessible
- Check file permissions on the target directory
- Ensure file names don't contain special characters
- Use absolute paths instead of relative paths
📎 Multiple File Upload Issues
Problem: Multiple files not uploading correctly Solutions:
- Verify the separator matches your file list format
- Check that all file names are valid
- Ensure all files exist in the specified directory
- Test with a small number of files first
🏷️ Browser Window Title Issues
Problem: Wrong file dialog window selected Solutions:
- Use a unique, descriptive window title
- Close other file dialogs before running the automation
- Check that the title matches exactly (case-sensitive)
🔍 Debug Steps
- Check Helper Program Status: Verify the program is running in system tray
- Test File Access: Manually verify files can be accessed from the specified path
- Check Browser Console: Look for JavaScript errors in browser developer tools
- Test with Simple Files: Start with basic file types (txt, jpg) before complex formats
📚 Examples
- Example-15 - Single file upload example
- Example-25 - Multiple file upload demonstration