Site Form
Forms are the specific pages on your website where you want to execute the extension for automated data filling. Each form is configured with URL matching rules and field definitions.

📋 Form Options
Essential form configuration options for automated form filling.
| Form Options | Required | Description | Example Values |
|---|---|---|---|
| Page URL | Yes | Target page URL for form execution | https://example.com/contact |
| URL Match Type | Yes | Method for matching page URLs | Full URL, Pathname, Hostname, RegEx |
| Description | No | Optional description for form identification | Contact Form, Registration Page |
| Active/Inactive | Yes | Enable or disable form processing | Active, Inactive |
| Delay Time Before Running This Form | No | Wait time before form execution | 0, 500, 1000 (milliseconds) |
| Delay Time After Running This Form | No | Wait time after form execution | 0, 500, 1000 (milliseconds) |
🚀 Insert Site Form
Create and configure forms for automated data filling on your website.
📝 Step-by-Step Process
- First Insert Site
- Click the edit site button
- Open Site Form Pages tab and click
insert formbutton left side of the delete button - Fill Page URL and URL Match Type
- Click Save Button
⚙️ Form Management Options
| Option | Description | Use Case |
|---|---|---|
| Page URL | Target page URL | Specify which page to fill |
| Match URL Types | URL matching method | Flexible page targeting |
| Description | Form identification | Organize multiple forms |
| Active/Deactivate | Enable/disable form | Control form processing |
| Move Up/Down | Reorder forms | Prioritize form execution |
| Form Fields | Manage field definitions | Configure data filling |
| Edit Form | Modify form settings | Update form configuration |
| Duplicate | Copy form settings | Create similar forms quickly |
| Copy Form | Copy form to clipboard | Share form configurations |
| Paste Form | Paste form from clipboard | Import form configurations |
| Delete Form | Remove form | Clean up unused forms |
🔗 Form URL Match Types
Configure how the extension identifies and matches target pages for form execution.
| Match Type | Description | Use Case | Example |
|---|---|---|---|
| Match with Full URL | Exact URL match | Specific page targeting | https://example.com/contact |
| Match with URL pathname | Match URL path only | Multiple domains, same path | /contact, /register |
| Match with URL hostname | Match domain only | All pages on domain | example.com |
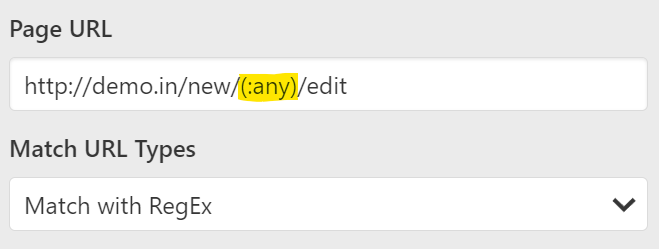
| Match with RegEx | Regular expression match | Complex URL patterns | .*\/user\/\d+\/edit |
🎯 RegEx Matching Examples
Special RegEx Patterns:
| Pattern | Description | Matches |
|---|---|---|
(:any) | Match any characters | abc, 123, xyz |
(:any(:end)) | Match any characters to end (Don't use this is middle of the url) | abc, 123xyz |
URL Matching Examples:
| SITE FORM URL WITH REGEX | SITE FORM URL | IS MATCHED |
|---|---|---|
http://demo.in/new/(:any)/edit | http://demo.in/new/jK33k3ui/edit | ✔ |
http://demo.in/new/(:any(:end)) | http://demo.in/new/jK33k3ui | ✔ |
Note
You can test the RegEx here.
⏱️ Form Timing Configuration
Control form execution timing for optimal performance and reliability.
| Setting | Description | Example Values | Impact |
|---|---|---|---|
| Delay Time Before Running This Form | Wait time before form execution | 0, 500, 1000 (milliseconds) | Prevents timing issues with page loading |
| Delay Time After Running This Form | Wait time after form execution | 0, 500, 1000 (milliseconds) | Ensures form data is properly submitted |
Note
For random time delay, you can use Random Integer Variable. Use variable {{random.integer[1000][2000]}} for random milliseconds.
Pro Tip
Use the browser console to monitor form filling timing and adjust delays accordingly.
🔄 Insert Multiple Forms
Add multiple forms to the same site for comprehensive automation coverage.
📋 Prerequisites
- First insert the main form of the site
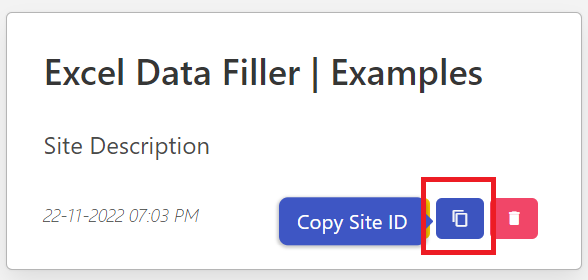
- Copy the site ID using the method below
🆔 Copy Site ID
After the site is inserted, copy the site ID using the extension interface:
Steps to Copy Site ID:
- Navigate to the site management page
- Locate the target site
- Click the copy ID button
- Site ID is copied to clipboard
➕ Insert Additional Forms
After copying the site ID, insert additional forms:
Steps to Insert Form:
- Open the target form page in your browser
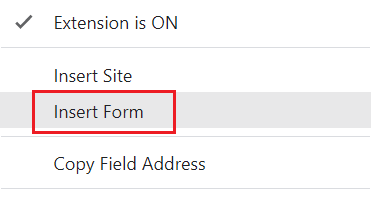
- Right-click on the extension icon
- Select "Insert Form" from the context menu
- Paste the site ID in the prompt box
- Press OK to confirm
- Form is inserted into the specified site
DONE 🎉
📝 Insert Form Fields
Configure individual fields within each form for precise data filling automation.
Purpose: Define which form fields to fill and how to fill them with data from Excel templates.
Process:
- Fill the form on the target website
- Insert form fields using the extension
- Configure field properties (name, type, selector)
- Test field filling to ensure accuracy
Field Configuration Options:
- Field Name - Unique identifier for Excel column
- Field Type - Data type and validation rules
- Field Selector - Element location method
- Field Value - Data source (Excel or default)
- Timing Settings - Before/after delays
Pro Tip
Start with the most important fields first, then add additional fields as needed for complete automation.
Important
Ensure field selectors are unique and reliable to prevent filling errors during automation.