Excel Template
Manage your Excel data source for automated form filling with support for both uploaded Excel files and Google Sheets integration.
Overview
Excel templates serve as the data source for your automation workflows. The extension supports two types of Excel sheet integration:
- 📤 Upload Excel Sheet - Upload local Excel (.xlsx) files
- 📊 Google Sheet (Beta) - Connect to Google Sheets for real-time data access
Excel Sheet Type Selection
Choose between two methods for managing your Excel data:
📤 Upload Excel Sheet
Upload local Excel files directly to the extension.
Features:
- Upload .xlsx files from your computer
- Download template based on your form fields
- Delete uploaded Excel file
- Offline data access
📊 Google Sheet (Beta)
Connect to Google Sheets for cloud-based data management.
Features:
- Real-time data synchronization
- Two connection types: OAuth2 and Service Account
- Multi-browser support with Browser ID
- Automatic sheet updates
- Cloud-based data storage
Method 1: Upload Excel Sheet
Step 1: Select Excel Sheet Type
- Navigate to Upload Excel tab
- Select Upload Excel Sheet radio button
Step 2: Upload Excel File
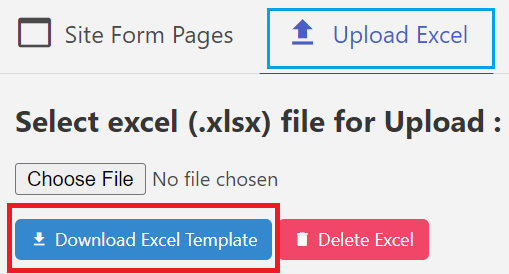
Select excel (.xlsx) file for Upload:
- Click "Choose File" button
- Select your Excel file (.xlsx format)
- File will be uploaded automatically
Available Actions:
| Button | Description |
|---|---|
| 💾 Save Excel Template | Save and update the uploaded Excel data template |
| 📥 Download Excel Template | Download template with your form field structure |
| 🗑️ Delete Excel | Remove the currently uploaded Excel file |
Step 3: Excel Data Status
When No Excel File is Uploaded:
The interface will display:
Not Found
Excel Data Not Available, Please Upload Excel File.
When Excel File is Uploaded:
- Excel data becomes available for form filling
- Data can be viewed in the Excel Data tab
- Form filling can begin using the uploaded data
Method 2: Google Sheet (Beta)
Connection Types
Google Sheet integration offers two connection methods:
🔐 OAuth2 (Login Required)
Connect using your Google account with OAuth2 authentication.
Requirements:
- Google account login
- Permission to access Google Sheets
- Internet connection
Setup:
- Select Google Sheet (Beta) radio button
- Choose OAuth2 (Login Required) connection type
- Click "Check Account Connection" to authenticate
- Sign in with your Google account
- Grant necessary permissions
🔑 Client (Service Account, No Login Required)
Connect using a Google Cloud service account without login.
Requirements:
- Google Cloud Console service account
- JSON key file (private_key, client_email)
- Sheet shared with service account email
Setup:
- Select Google Sheet (Beta) radio button
- Choose Client (Service Account, No Login Required) connection type
- Click "Click to Upload JSON File" button
- Upload your service account JSON key file
Create Service Account
Create a service account in Google Cloud Console, download JSON key file (private_key, client_email), share the sheet with the service account email.
Google Sheet Configuration
Required Fields
| Field | Description | Example |
|---|---|---|
| Spreadsheet URL | Full URL of your Google Sheet | https://docs.google.com/spreadsheets/d/1A2B3C4D5E6F7G8H9I0... |
| Spreadsheet Sheet Name (Sheet1) | Name of the specific sheet tab | Sheet1, Data, FormData |
| How many rows of the sheet to fetch? | Number of rows to retrieve | 30, 50, 100 |
Optional Features
🆔 Fetch Sheet Row Data Using Browser Id
Enable this option to use different data for different browsers.
How it works:
- Toggle "Fetch Sheet Row Data Using Browser Id" checkbox
- Enter browser ID names in the input field
- Create a column named
{BROWSER-ID}in your sheet - Fill browser ID names in this column
Example:
Browser IDs: browser-1, browser-2, browser-3Use Browser ID
Use Browser ID if you use same sheet in multiple browser, create a new column with this name {BROWSER-ID} and fill the browser id name in this column.
🚫 Ignore Column Values When Updating
Prevent specific columns from being updated when syncing data.
How to use:
- Toggle "Ignore column values when updating the sheet?" checkbox
- Enter column names to ignore (press Enter after each)
- These columns will be excluded from updates
Example:
title, description, notesGoogle Sheet Actions
🔍 Check Account Connection
Verify your Google account authentication status.
For OAuth2:
- Click "Check Account Connection" button
- Sign in if not already authenticated
- Verify connection status
For Service Account:
- Upload JSON key file first
- Click "Check Account Connection" button
- Verify service account credentials
📊 Check Sheet Connection
Verify connection to your Google Spreadsheet.
Steps:
- Enter Spreadsheet URL
- Enter Sheet Name
- Click "Check Sheet Connection" button
- Verify sheet access and data availability
📤 Update Sheet With Site Data
Sync your form field structure with Google Sheet.
Purpose: For updating google sheet with your extension site data. this will insert columns and create database sheet.
How it works:
- Click "Update Sheet With Site Data" button
- Extension reads your form field configuration
- Creates/updates columns in Google Sheet
- Generates database structure based on field types
What gets updated:
- Column headers matching field names
- Data validation rules
- Field type formatting
- Required field indicators
🗑️ Clear Sheet Cache
Clear cached Google Sheet data to fetch fresh data.
When to use: If you have changed any data in the sheet or added new columns, it is essential to clear the cache before using the sheet.
Steps:
- Click "Clear Sheet Cache" button
- Cache will be cleared immediately
- Next data fetch will retrieve fresh data from Google Sheet
Excel Template Download
📥 Download Excel Template
Generate and download an Excel template based on your form fields.
How it works:
- Click "Download Excel Template" button
- Extension generates template with:
- Column headers matching field names
- Sample data for guidance
- Proper formatting for each field type
- File downloads to your default download folder
File naming: [SiteName]_Template_[Date].xlsx
Prerequisites
Before using Excel templates, ensure you have:
- ✅ Site Created - A site must be set up in the extension
- ✅ Form Added - At least one form must be added to the site
- ✅ Fields Configured - Form fields must be properly configured
- ✅ Field Types Set - Each field must have a defined field type
Workflow Integration
Upload Excel Sheet Workflow
- Download Template - Get the latest template structure
- Fill Data - Enter your data in Excel
- Upload File - Upload the filled Excel file
- Run Automation - Execute automated form filling
Google Sheet Workflow
- Connect Account - Authenticate with Google
- Configure Sheet - Set spreadsheet URL and sheet name
- Update Structure - Sync form fields with sheet columns
- Fill Data - Enter data in Google Sheet
- Run Automation - Execute automated form filling
- Clear Cache - Clear cache when data changes
Troubleshooting
Upload Excel Sheet Issues
Issue: Template not downloading
Solutions:
- Ensure all form fields are properly configured
- Check if the site has at least one form
- Verify browser download permissions
- Try refreshing the extension options page
Issue: Excel file not uploading
Solutions:
- Verify file format is .xlsx
- Check file size is reasonable
- Ensure file is not corrupted
- Try a different Excel file
Google Sheet Issues
Issue: Cannot connect to Google account
Solutions:
- Check internet connection
- Verify Google account credentials
- Clear browser cache and cookies
- Try re-authenticating
Issue: Sheet connection failed
Solutions:
- Verify spreadsheet URL is correct
- Check sheet name matches exactly (case-sensitive)
- Ensure sheet is shared with service account (for Client connection)
- Verify permissions are granted
Issue: Data not updating
Solutions:
- Click "Clear Sheet Cache" button
- Verify sheet has data in correct format
- Check column names match field names
- Ensure row count is set correctly
Issue: Browser ID not working
Solutions:
- Verify
{BROWSER-ID}column exists in sheet - Check browser ID names are entered correctly
- Ensure browser ID values match in sheet
- Clear cache and try again
Best Practices
✅ Do's
- Use descriptive sheet names - Make sheet names clear and meaningful
- Keep data organized - Maintain consistent data formatting
- Regular backups - Backup your Excel files and Google Sheets
- Clear cache after changes - Always clear cache when updating Google Sheets
- Test with small datasets - Verify automation works before bulk processing
- Use Browser ID for multi-browser - Implement Browser ID when using same sheet across browsers
❌ Don'ts
- Don't modify column headers - Keep column names matching field names
- Don't use special characters - Avoid special characters in sheet names
- Don't forget to clear cache - Always clear cache after Google Sheet updates
- Don't share sensitive data - Be cautious with service account credentials
- Don't exceed row limits - Keep row count reasonable for performance
Related Documentation
Support and Help
If you need assistance with Excel templates:
- Check the Log for detailed error information
- Review Field Types for configuration help
- Visit our Support Channels for community assistance
- Report issues on our GitHub Repository